

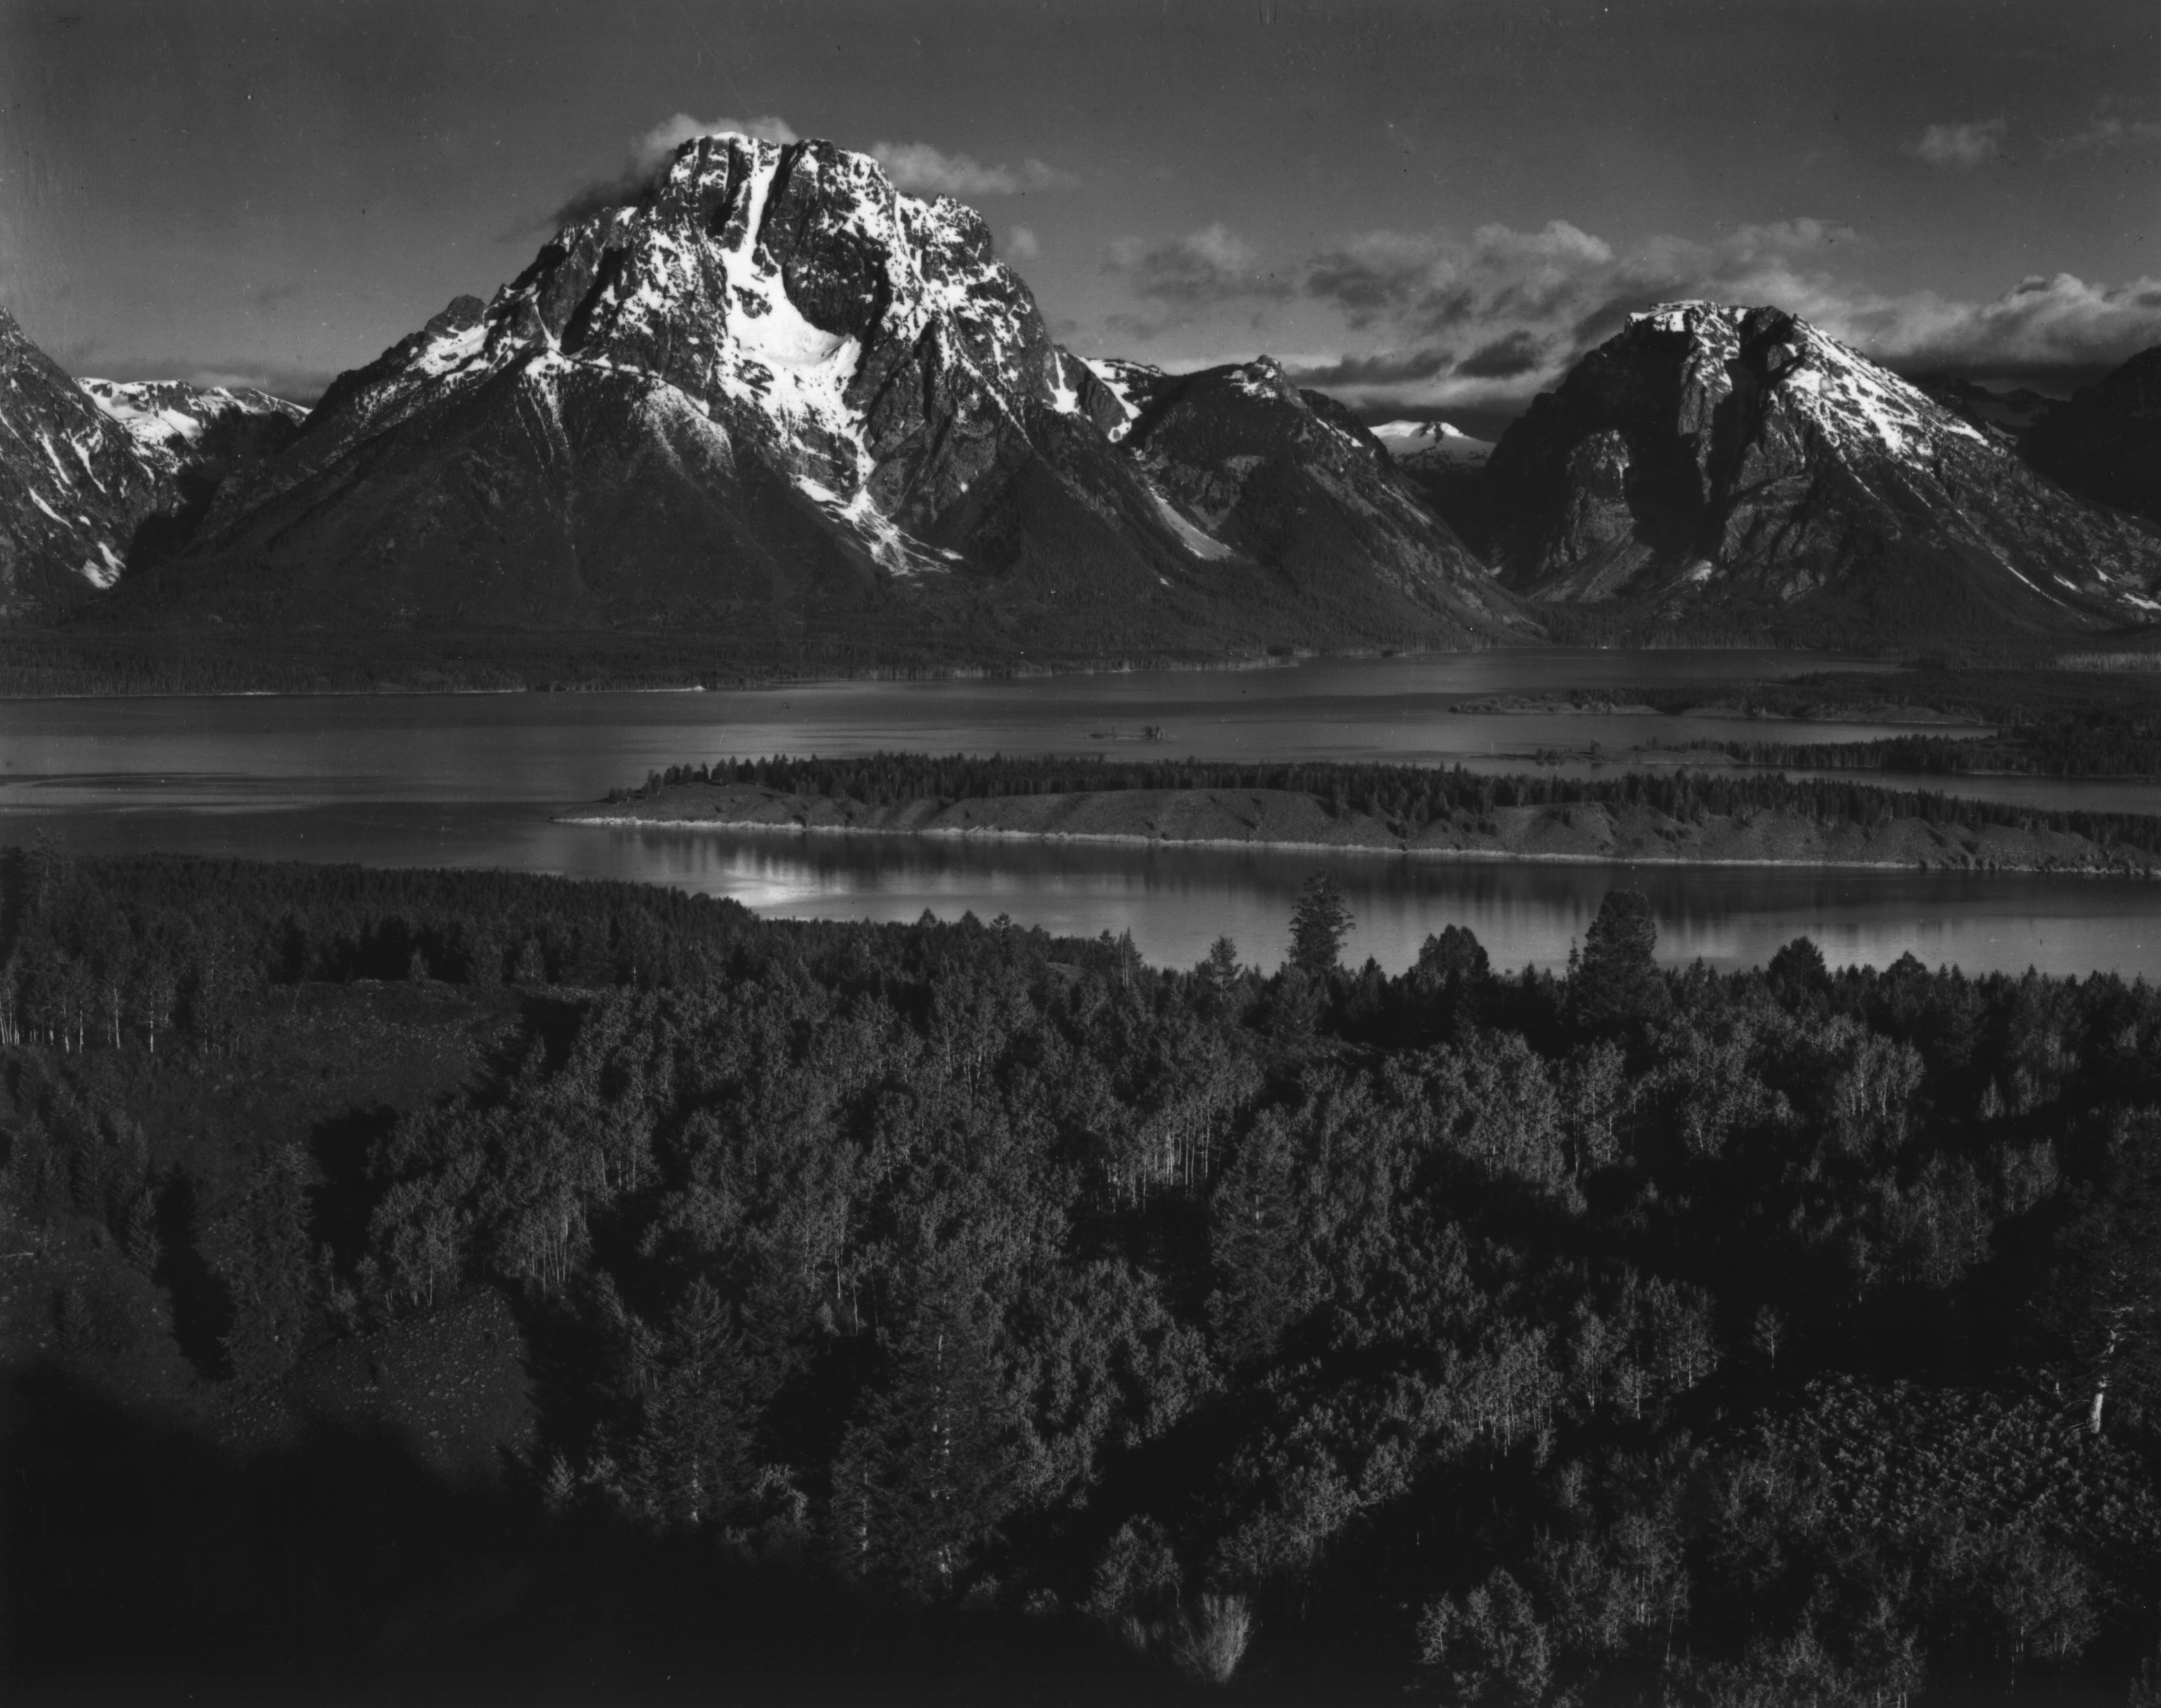
Year-Round Iconic View of the Teton Range

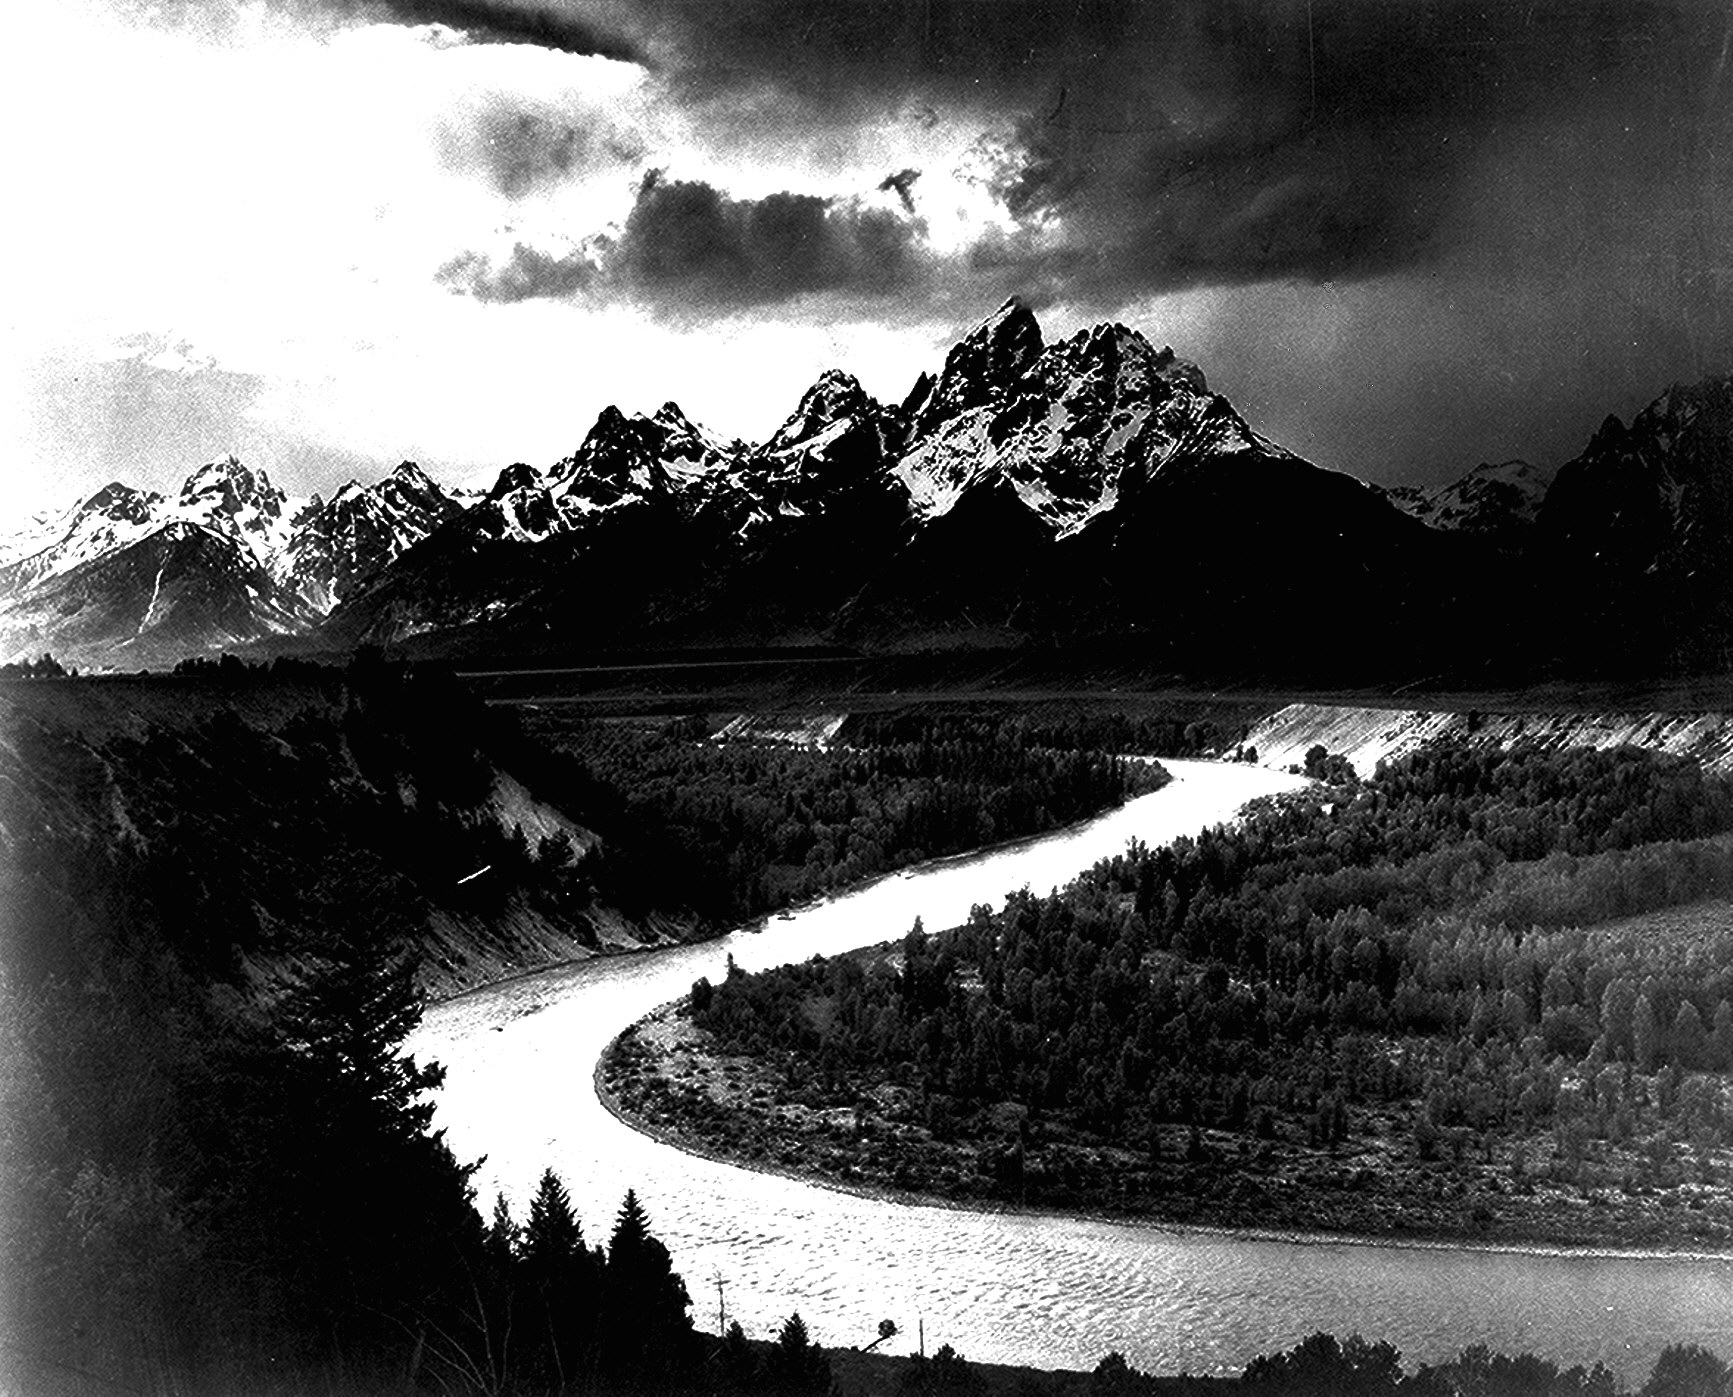
The Tetons and the Snake River: Ansel Adams (1942)
 Satellite Map of Snake River Overlook:
Click the link or the image to see a larger image and interactive map via The Photographer’s Ephemeris. Snake River Overlook is visible with a very short walk from the large, well signed pull-out along Highway 89/191. You’ll find it on the GTNP map, too.
![]()
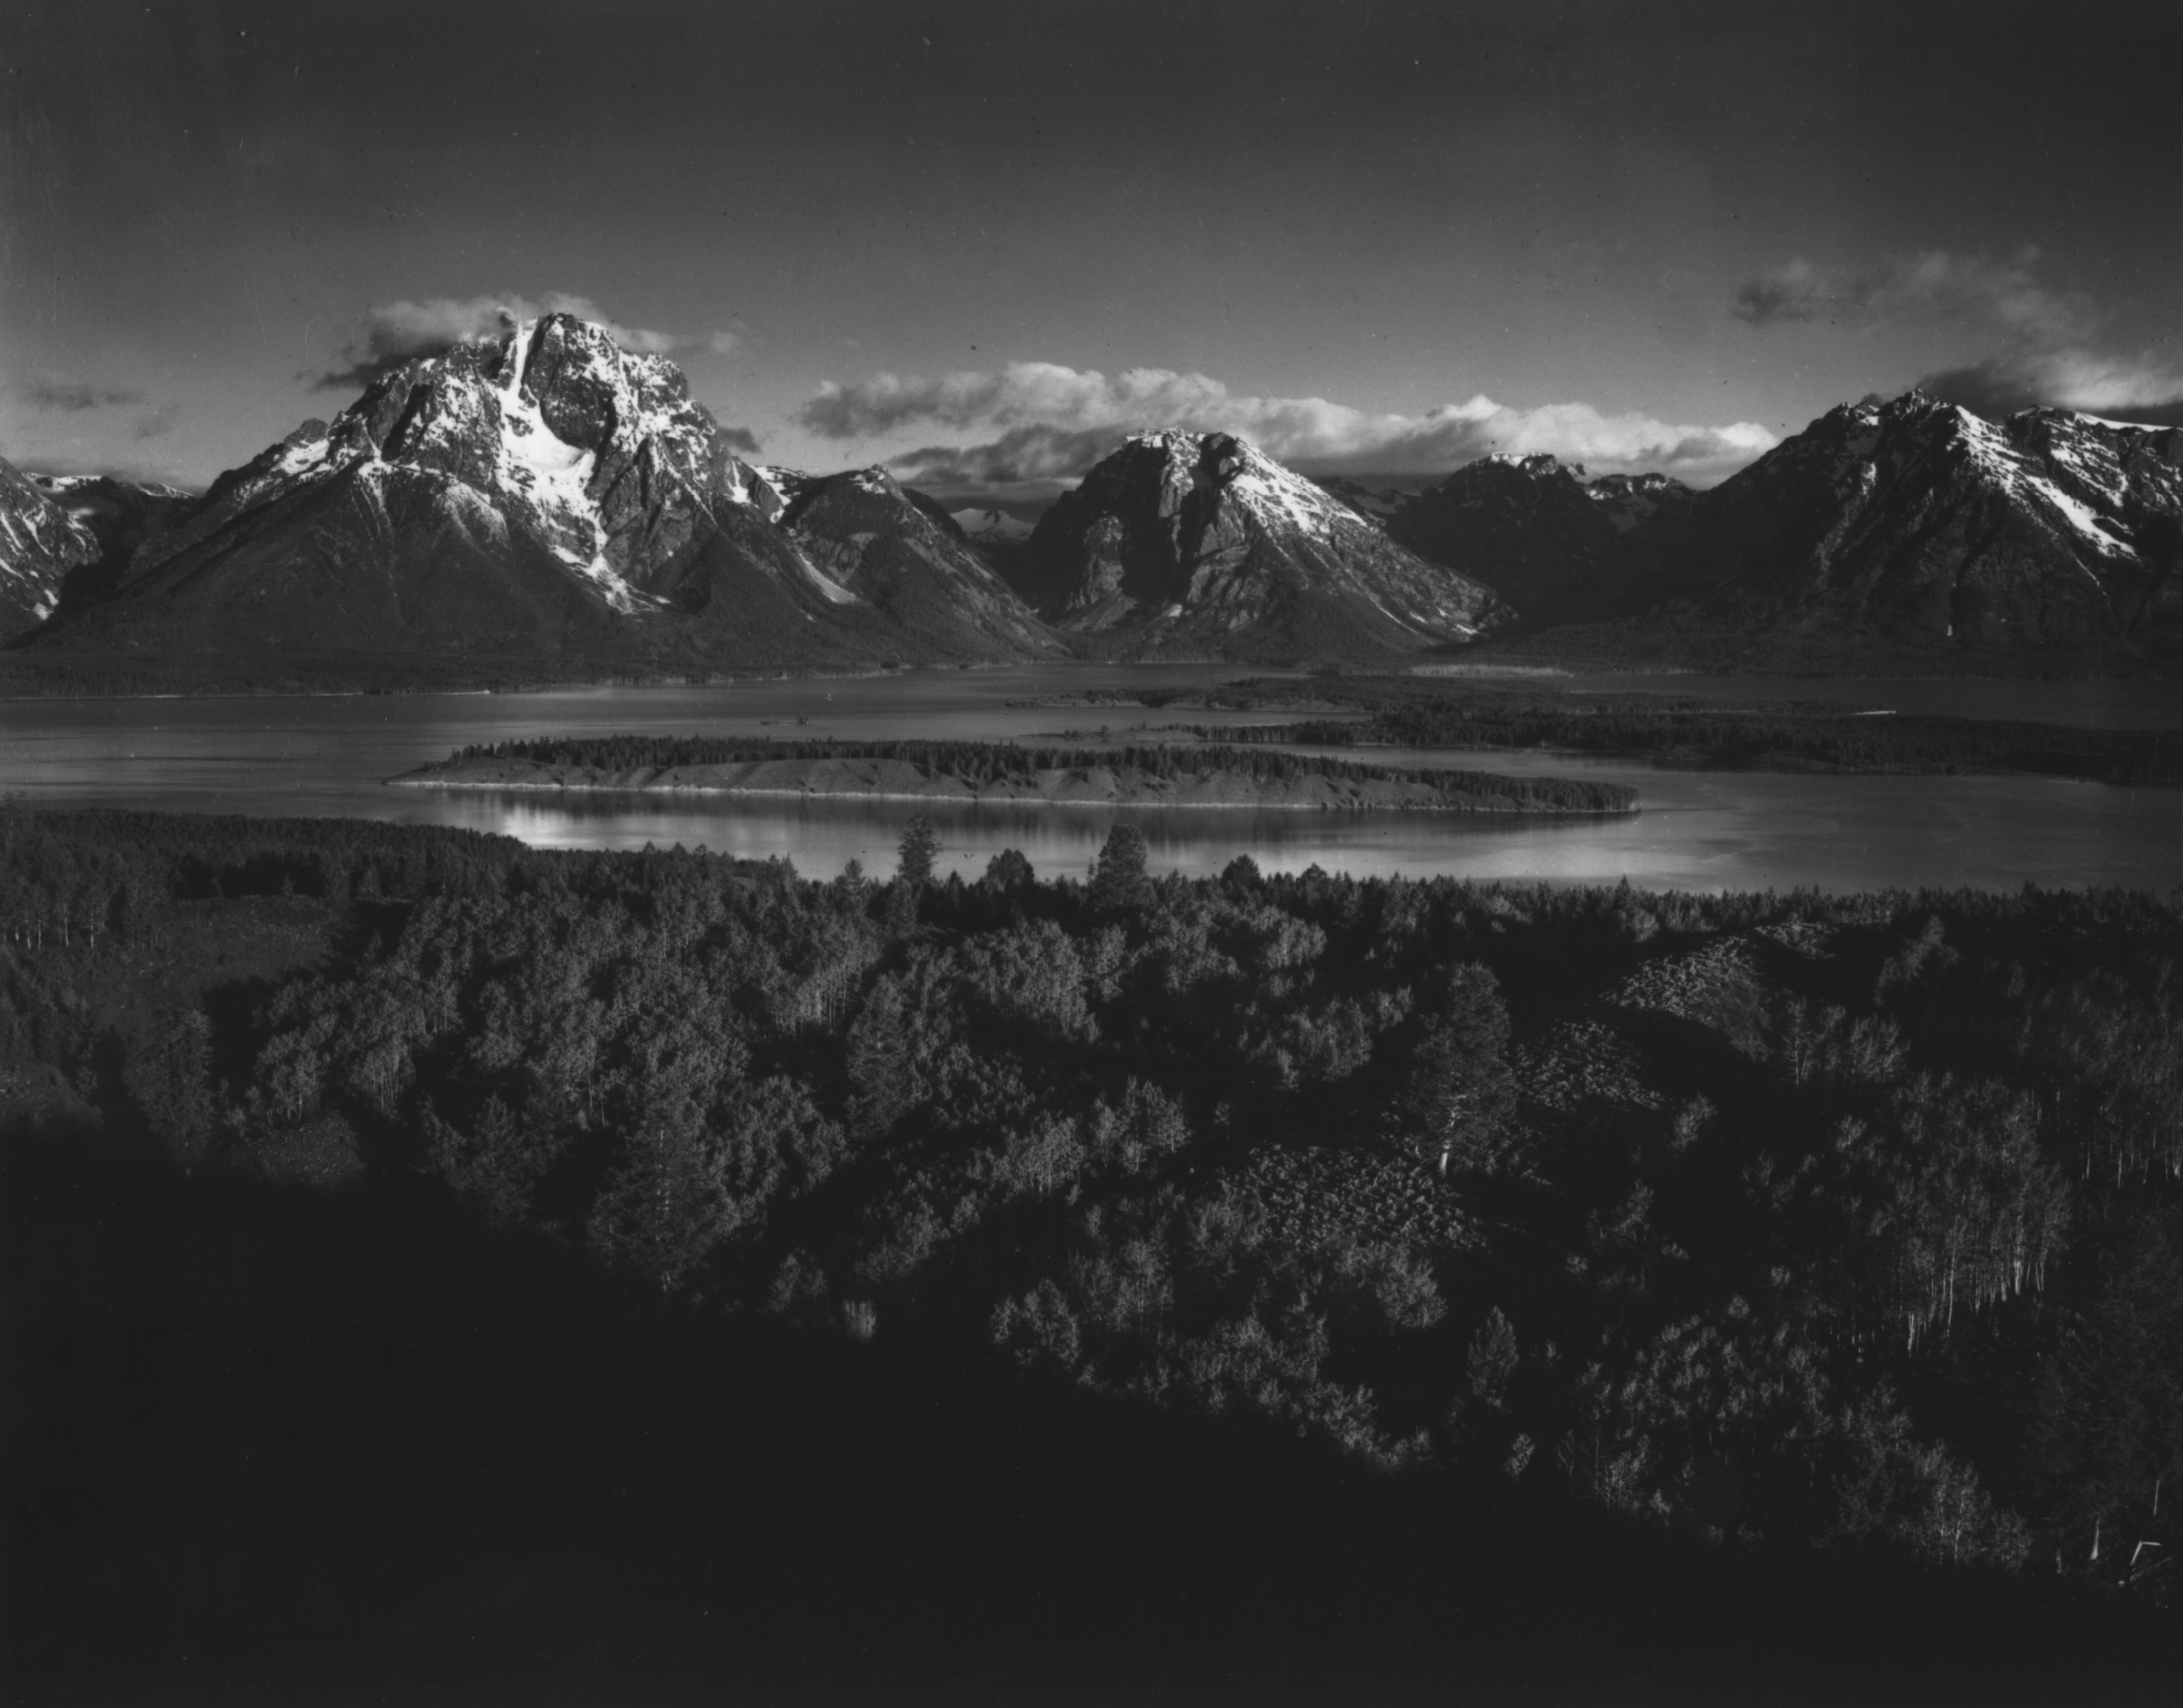
Snake River Overlook
If we could turn the clock back 73 years, we could see the bend of the Snake River as Ansel Adams found it in his 1942 iconic image. Unfortunately, trees have since grown tall enough to obscure much of the river. It is still a breathtaking view whether you have a camera in your hand or go there just to enjoy it! Ansel had it tougher than we have it now. The highway from Moose Junction to Moran Junction wasn’t built until around 1958. Ansel would have had to drive over rough dirt roads from a spot near present day Lost Creek Ranch. See Early Roads in Grand Teton National Park:
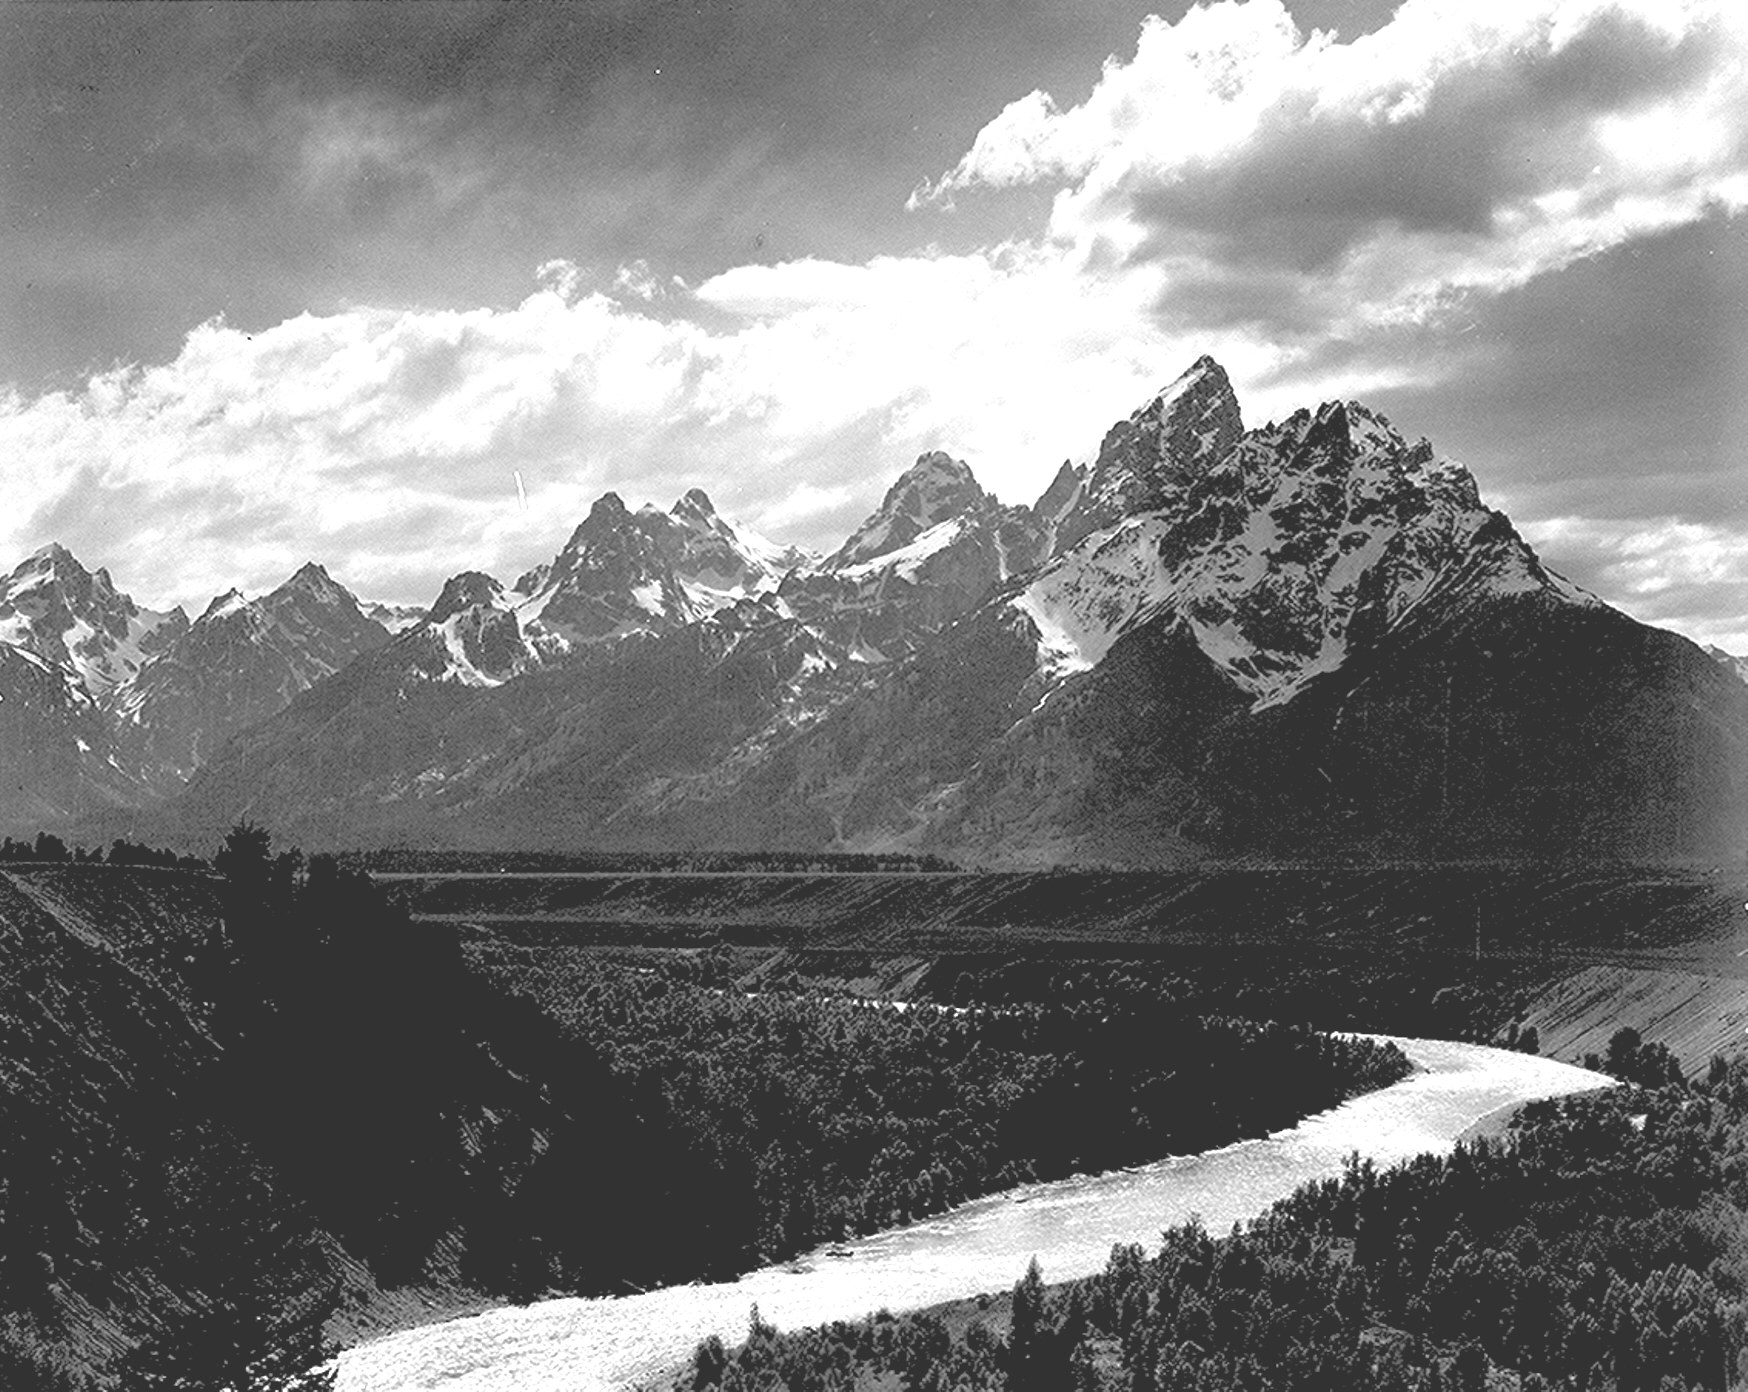
Over my 28+ years of living here, I’ve photographed from roughly the same spot countless times. This page will show quite a few of them!

Early Morning at Snake River Overlook: I typically think of Snake River Overlook as a sunrise location.

Sunset at Snake River Overlook: Ansel’s image was a sunset capture—along with the image above. Sunset images in the Tetons take a fair amount of luck and usually mean getting home at a very late hour.

Snake River Overlook Pano: In December and January, the moon sets somewhere between the Grand and Mt. Moran. This is one of my favorite locations for panoramic images. It’s possible to capture this shot as a single image with a wide angle lens, but I like to set up and capture multiple images that are later “stitched” into a single panoramic image. Check out: Panoramic Images: Tips for Getting More of the Tetons in a Shot

Cloudless Alpenglow: For my landscape images, I prefer at least a few clouds. There are many times I get to the spot before sunrise, only to have clouds or fog obscuring the entire range. Check out: Alpenglow: Morning’s Fleeting Phenomenon

On mornings when I am trying to capture the setting full moon, I typically still want a “few” clouds, but still be able to see the moon. Check out: Shooting the October Moon: Tips for Being at the Right Place at the Right Time
Stages of a Sunrise

There are several “stages” of a sunrise. For around two hours before sunrise, the night sky goes into what many photographers call the “blue light” period. Stars and clouds are often visible.

Alpenglow: At a point about 30 minutes before first light, the sky can turn to a beautiful hue of purple with streaks of magenta and rose.

Alpenglow in Transition: The deep purple eventually softens and begins to turn towards a murky gray. I seldom shoot during this period, but this image still had some rose and magenta.

First Light on the Peaks: Eventually, the “gray period” passes and I begin to see the first golden glow of morning light.

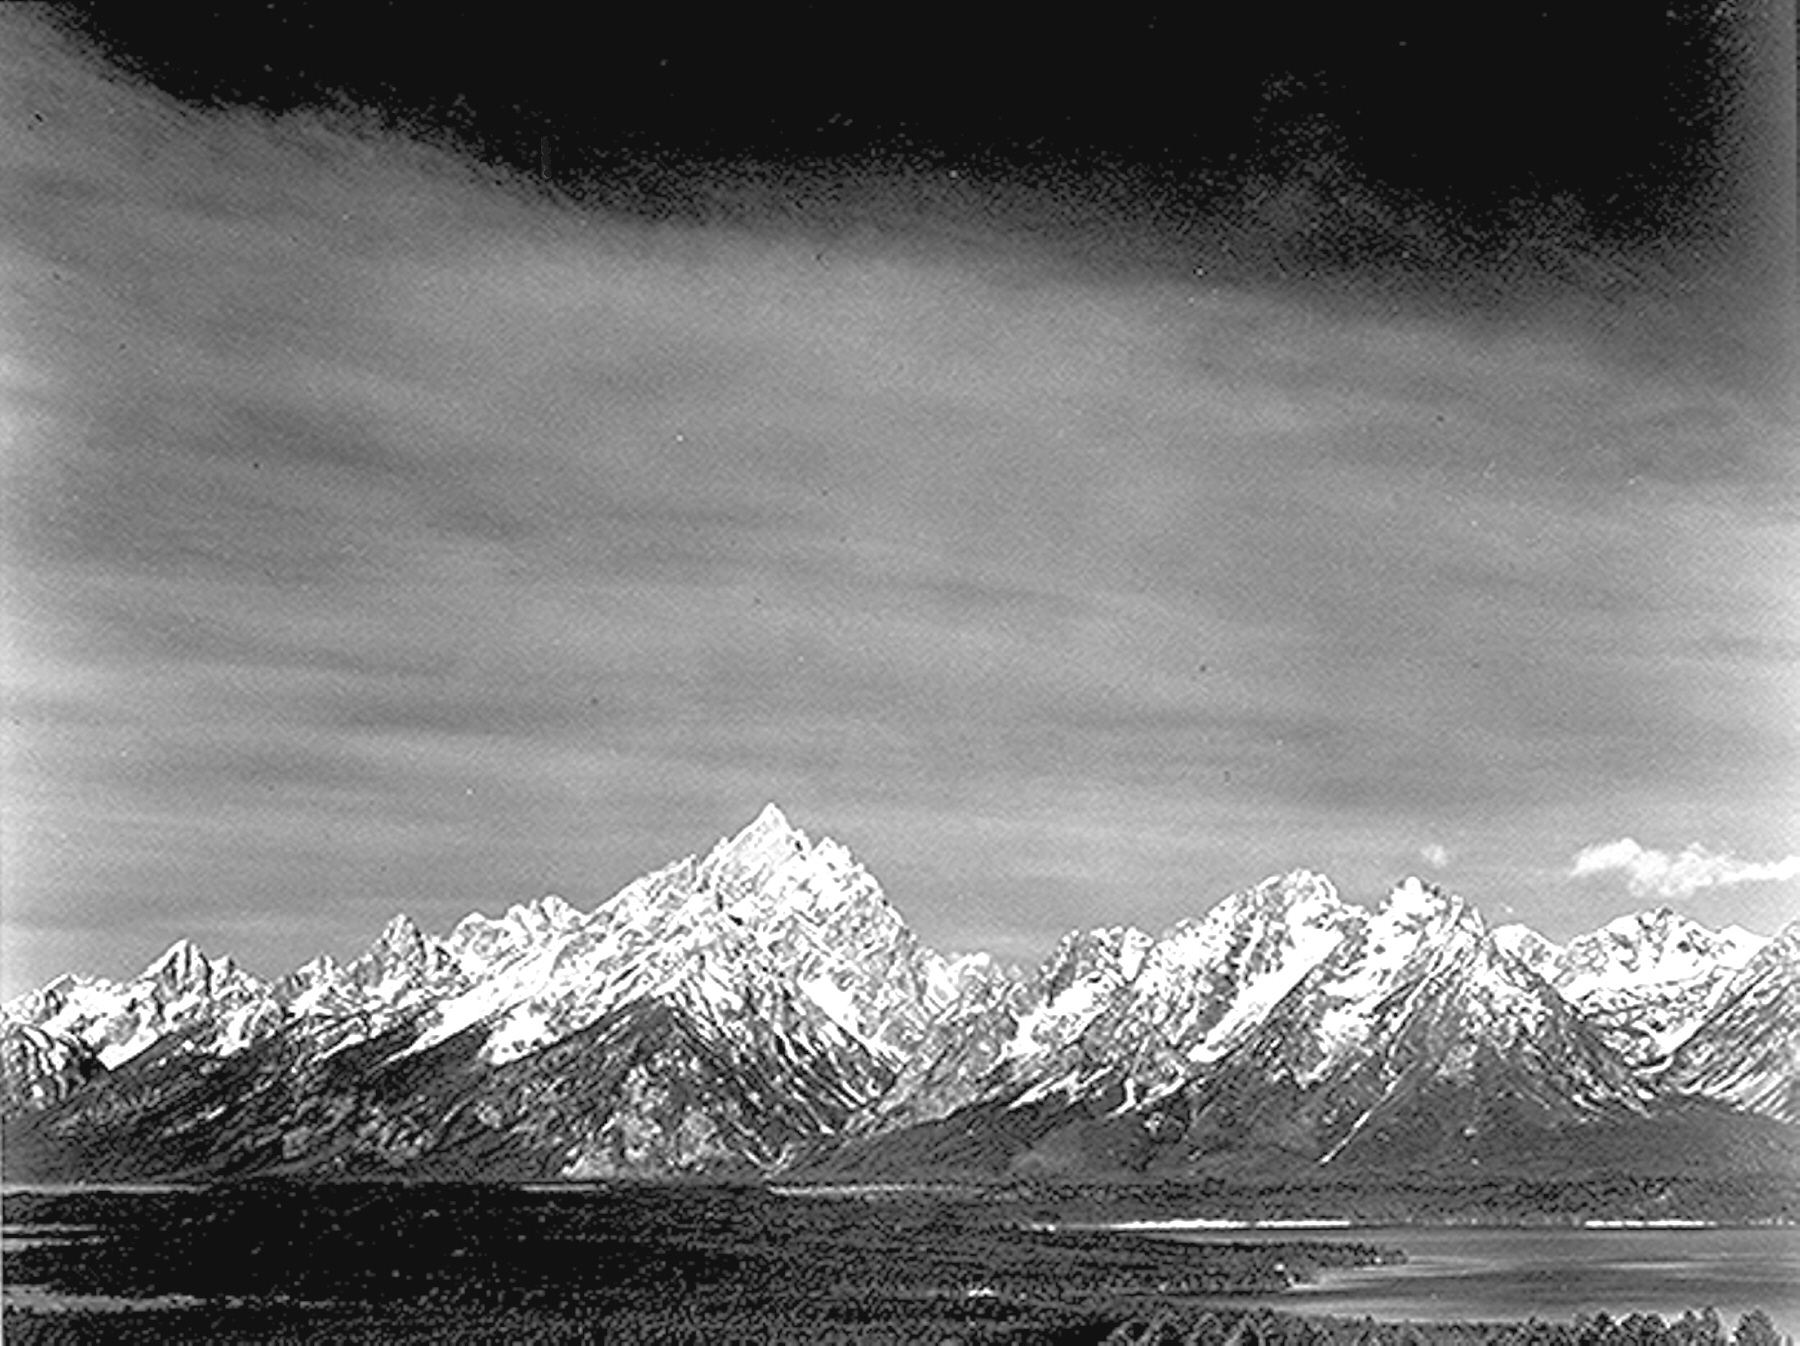
Fully Lit Teton Range: As the sun rises in the east, the range is lit with golden light. Clouds add to any Teton range scene.

White Light: The golden light period usually passes quickly, replaced with neutral white with maybe a touch of amber.

Beginning Shadows: There’s a rock wall along the overlook. At some point in the morning, the rock wall creates an unnatural shadow across the close trees. I can usually handle it just at the tips as seen here, but as the line drops, I typically fold up the tripod and start looking for something else to photograph. I should mention it is possible to hang around and wait until the sun rises enough to drop the shadows to the base of the trees.
If you’ve ever been set up to photograph the Alpenglow period through this fully lit stage, you’d feel the mountains are “blown out”! The light will look bright and uninteresting. At it turns out, the day is just beginning for most tourists—still having breakfast in town.
Other Moods and Comments

Some mornings are magical! …others not so much. There’s always a gamble when I get up a couple of hours before first light. Conditions can look promising when heading north, then turn dull and cloudy on the way up. Conversely, I sometimes take a chance when clouds look too thick, only to have a break and light pours over the range.

Summer at Snake River Bend can be wonderful! Still, when I look back over my catalog of images, I see that most of them were taken in the Winter. Hmmmm! Actually, I know why. During the Winter months, Snake River Overlook is open—one of the few places along the valley floor where you can get some sort of foreground element. The Mormon Row barns are essentially out of the running with Antelope Flats Road closed. Oxbow Bend is frozen over and the water is low. Schwabacher Landing is totally off limits. So, Snake River Overlook gets a lot of my attention. Days are short, so I don’t have to get up terribly early. The shot above was taken in June, close to the longest days of the year. That means getting up VERY early….something like 4:00 am! In many ways, it can be well worth it. The sun is far to the north. This casts shadows to the left on trees and jagged peaks for much more definition. Springtime shots…well they look much like winter shots. By the time it looks like Spring, I am usually tired of photographing from the spot and am off looking for new locations as the roads reopen for the season. I have very few Fall images there either. There are almost no aspens or cottonwoods at Snake River Overlook to draw me to the spot in the Fall. I’d probably stop there if we get an early snow storm, but otherwise I am off in other parts of the park with more fall color. Anatomy of a Teton Landscape

By late in the summer, much of the snow melts on the Teton Range. They always look great, but I still like snow on them!

There are some cottonwoods in the river bottom, so if I were to hit it at peak season, this shot might be worth it. Again, I am usually at Oxbow or up on Shadow Mountain during the Fall.

During the Winter months, the Snake River is much less of a player. The flow is cut back considerably back at the Jackson Lake Dam and some of the water that actually does flow through freezes with shelf ice on both sides.

Timing a setting full moon is relatively easy to do with the aid of all the tools on the Internet. Snake River Overlook via The Photographer’s Ephemera: This page allows me to figure out when and where to go at various times of the year relative to the Grand or Mt. Moran. In the photo above, I was at the right place, but was there a day early. The moon was a big ball of gold. A day later, the moon would be setting roughly 15 minutes later and would be better defined against the Alpenglow sky. But, on that morning, clouds could be covering everything!

In 2013, I was in the right place, but only a couple of minutes after this image, the moon dipped behind the clouds. The moon event didn’t look too promising at that point.

Samuel Clemens, (a.k.a. Mark Twain) said, “If you don’t like the weather, just wait a few minutes”. That saying works here. As the moon sank towards the ridge line, clouds thinned and turned pink.

This shot was taken on a “near full” moon. On a long exposure, a full moon can light up a night scene to the point it looks like a daylight scene with stars.

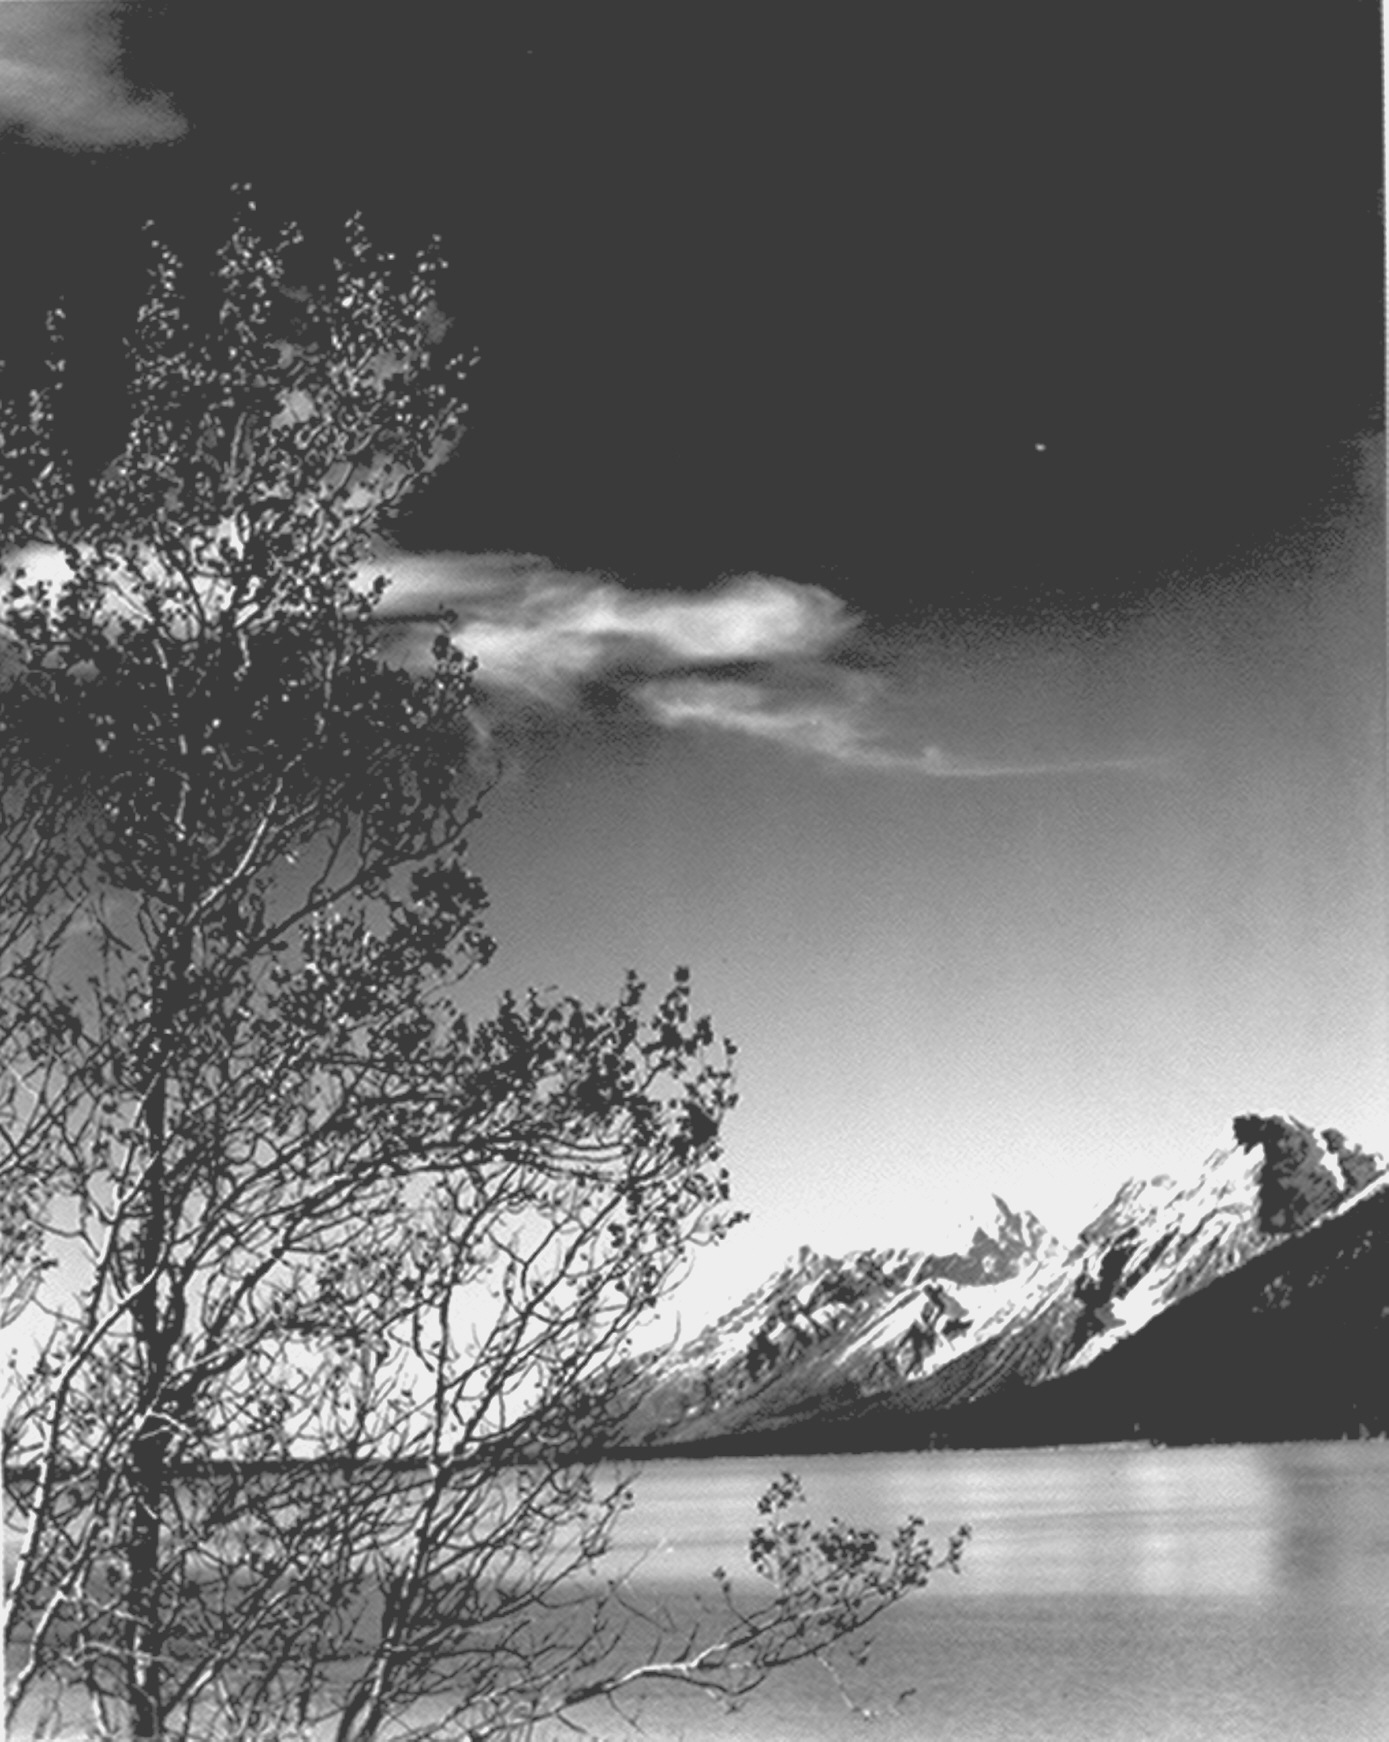
Night Time at Snake River Overlook: Without a bright moon, more stars are visible. I chose to keep this image dark to more closely resemble a night sky. Jackson Hole has some of the darkest (least light polluted) skies in the West.

Most people seem to get drawn into the beauty of the entire scene at Snake River Overlook. I occasionally take my telephoto lenses there and work much tighter.
Photographic Considerations at Snake River Overlook
I currently have a 16.2mpx Nikon D4 and a 35mpx Nikon D800 pair of bodies. Both are full frame. In some of the earlier shots, I was using a DX crop Nikon D300 12mpx body. In most cases, I use the D800 for my landscapes. At Snake River Overlook, I typically carry a 24-70mm lens and a sturdy tripod. I used the same lens when working with my D300 bodies. If I have time, I usually carry a 70-200mm lens down to the wall, even if I don’t use it. For some setting moon shoots, I lug the 200-400mm along, too, but only if the moon is setting very close to the peak of the Grand. I almost always use a tripod for my landscapes, and I think it is absolutely necessary for the very early, low light shots. I have leveling bases on both of my tripods—making it quick and easy to set up for panoramic images. I usually set the Aperture to F/8 to F/11 and shoot in Aperture Priority at the base ISO 100. (see Digital Camera Diffraction discussions) I use Manual Priority for the night shots. For the panos, I now use the D800 and shoot in “landscape” aspect. It usually takes three to four shots for the stitched panos. When using the D4 or D300, I normally take the shot in “portrait” aspect and it typically takes about 8 to 9 shots. Here’s that link again: Panoramic Images: Tips for Getting More of the Tetons in a Shot
Over the years, I’ve looked for alternative locations for shots at Snake River Overlook. I’ve walked a mile or so in either direction and haven’t found any worthwhile spots. Some people jump the rock wall at the north end and shoot from the knoll just below. I don’t think it helps the angle that much so I quit doing it. Each year, thousands of people take photos at essentially the same two or three spots along the retaining wall. People have been going there during all the years since Ansel took his shot 73 years ago. I don’t know of too many ways of making a shot there that hasn’t been done quite a few times before. Instead, the elements that set one image apart from others are the moods of the light and clouds that day. I keep going back because there are seldom two days exactly the same. Once in a while, I hope to hit it just right.
It’s possible to drive a mile or so north on the highway and drive down to Deadman’s Bar, then hike down the river for some interesting shots. A float trip down the Snake will also put you in places much less photographed.
![]()
Ansel Adams
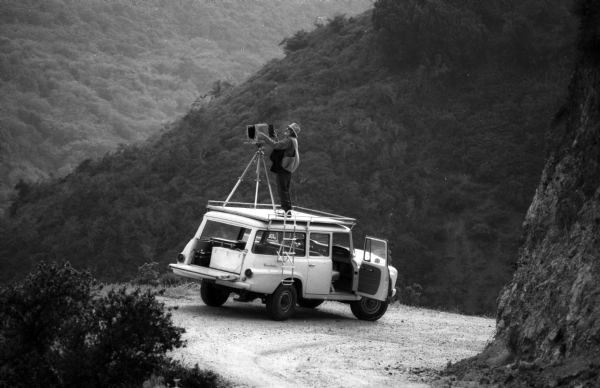
Image link: http://www.influx.co.uk/wordpress/blog/ansel-adams-cars/#sthash.DeWBHGtJ.dpbs
- American Masters: Ansel Adams
- Best of the Best: Ansel Adams
- Lessons from Photography Masters: Ansel Adams
- Influential Photographs: The Tetons and the Snake River, 1942 by Ansel Adams
- Ansel Adams – Photography,Biography,Quotes of Ansel Adams
Ansel Adams: GRAND TETON NATIONAL PARK, WYOMING (From the National Archives)
| 79-AAG-1 | “The Tetons – Snake River.” |
| 79-AAG-2 | “Grand Teton,” view from river valley towards snow covered mountains, river in foreground from left to right. |
| 79-AAG-3 | “Grand Teton“ |
| 79-AAG-4 | “Grand Teton“ |
| 79-AAG-5 | “Mt. Moran, Teton National Park,” view across river valley toward Mt. Moran. |
| 79-AAG-6 | No caption provided by Mr. Adams. [Jackson Lake in foreground, with Teton Range in background, view looking southwest from north end of the lake.] |
| 79-AAG-7 | Mt. Moran and Jackson Lake from Signal Hill, [Grand] Teton National Park. |
| 79-AAG-8 | “Near [Grand] Teton National Park,” roadway, low horizon mountains, clouded sky (2 copies). |
| 79-AAG-9 | “Tetons from Signal Mountain,” valley, snow-capped mountains, low horizons (2 copies). |
| 79-AAG-10 | “In [Grand] Teton National Park,” snow covered peak. |
| 79-AAG-11 | “Grand Teton,” grassy valley, tree covered mountain side and snow covered peaks. |
![]()
Collected Best of the Tetons Links From this Page:
- Early Roads in Grand Teton National Park:
- Panoramic Images: Tips for Getting More of the Tetons in a Shot
- Shooting the October Moon: Tips for Being at the Right Place at the Right Time
- Alpenglow: Morning’s Fleeting Phenomenon
- Anatomy of a Teton Landscape
- Teton Sunrises: It Takes Two to Tango
If you enjoyed this post, please take a second or two and click one of the Social Media Icons below and share it with the rest of the world! MJ


![Near [Grand] Teton National Park](http://www.archives.gov/research/ansel-adams/images/aag08.jpg)
![In [Grand] Teton National Park](http://www.archives.gov/research/ansel-adams/images/aag10.jpg)